


Hey there! I'm an avid enthusiast and a supplier of corten steel art sculptures. Corten steel, also known as weathering steel, has this amazing ability to develop a rust - like appearance over time, which gives sculptures a unique and natural aesthetic. Today, I'm gonna walk you through how to create a corten steel art sculpture with a specific theme.
Step 1: Define Your Theme
The first and most crucial step is to come up with a theme for your sculpture. It could be anything from nature - inspired themes like a Modern Corten Mountain Design Sculpture that mimics the grandeur of mountains, or something more abstract that represents emotions, history, or cultural elements.
Let's say you're interested in a nature - based theme. You might want to depict the flow of a river, the silhouette of a forest, or the grace of a bird in flight. For an abstract theme, you could focus on concepts like harmony, chaos, or transformation. Once you've decided on your theme, start gathering inspiration. Look at art books, visit galleries, and browse online for similar sculptures. This will help you visualize how you can translate your theme into a three - dimensional form.
Step 2: Plan Your Design
After defining the theme, it's time to plan your design. You don't need to be a professional artist to create a basic sketch. Use a piece of paper and a pencil to rough out your ideas. Think about the overall shape, size, and proportions of the sculpture. Consider how it will interact with its surroundings if it's going to be an outdoor piece, like a Large - scale Outdoor Corten Steel Fountain Sculpture.
If you're not confident in your sketching skills, you can also use 3D modeling software. There are many free and paid options available online. These programs allow you to create a digital model of your sculpture, which you can then manipulate from different angles to see how it looks. You can experiment with different materials, colors, and textures in the virtual environment before you start working with the actual corten steel.
Step 3: Source Your Materials
Once you have a solid design in place, it's time to source your corten steel. As a supplier, I know that the quality of the steel is crucial for the final outcome of your sculpture. Look for a reliable supplier who can provide you with high - quality corten steel sheets or bars. The thickness of the steel will depend on the size and complexity of your sculpture. For smaller, more delicate pieces, you might use thinner sheets, while larger, more robust sculptures will require thicker materials.
In addition to the steel, you'll also need some basic tools. These include a cutting torch or a plasma cutter for cutting the steel, a grinder for smoothing the edges, and welding equipment for joining the pieces together. Make sure you have all the necessary safety equipment, such as gloves, goggles, and a welding mask, before you start working with the steel.
Step 4: Cut and Shape the Steel
Now comes the fun part - cutting and shaping the steel! Using your cutting torch or plasma cutter, carefully cut the steel according to your design. Take your time and make precise cuts. If you're new to cutting steel, it might be a good idea to practice on some scrap pieces first.
Once you've cut the pieces, use a grinder to smooth the edges. This will not only make the sculpture look more professional but also prevent any sharp edges that could be dangerous. You can also use the grinder to add texture to the steel if your design calls for it. For example, you could create a rough, weathered look to enhance the natural appearance of the corten steel.
Step 5: Assemble the Sculpture
After cutting and shaping all the pieces, it's time to assemble the sculpture. Use your welding equipment to join the pieces together. Welding corten steel requires some skill, so if you're not experienced, you might want to take a welding class or work with a professional welder.
As you assemble the sculpture, refer back to your design to make sure everything is in the right place. You can use clamps to hold the pieces in position while you're welding. Take your time and make sure the welds are strong and secure.
Step 6: Finish the Sculpture
Once the sculpture is assembled, it's time to give it the final touches. You can leave the corten steel to weather naturally, which will give it a beautiful rust - colored patina over time. However, if you want to speed up the process, you can apply a rust - inducing solution. There are many commercial products available on the market, or you can make your own using vinegar and salt.
After applying the solution, the steel will start to develop a rusty appearance within a few days. You can control the color and texture of the rust by adjusting the concentration of the solution and the amount of time it's left on the steel. Once you're happy with the finish, you can seal the sculpture with a clear coat to protect it from further corrosion and to enhance its appearance.
Step 7: Display Your Sculpture
Finally, it's time to display your corten steel art sculpture. If it's an outdoor piece, choose a location that will showcase its beauty and interact well with its surroundings. Make sure the ground is level and stable, especially for larger sculptures. If it's an indoor piece, consider the lighting and the overall decor of the room.

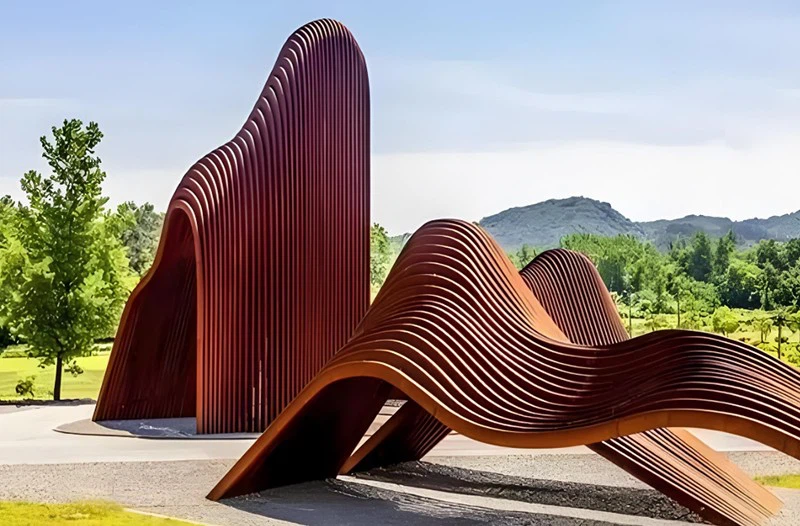
Your corten steel sculpture is now a unique work of art that reflects your creativity and vision. Whether it's a Corten Steel Artwork for a public space or a personal piece for your home, it's sure to make a statement.
If you're interested in purchasing corten steel for your own sculpture projects or if you're looking for pre - made corten steel art sculptures, feel free to reach out. I'm here to help you bring your creative ideas to life. We offer a wide range of corten steel products and can provide you with expert advice and support throughout the process.
References
- "The Art of Metal Sculpture" by John Smith
- "Corten Steel: Properties and Applications" by Jane Doe
- Online resources from various art and metalworking websites.
